Many times I have been asked by my friends how to make real looking paper leaves that also include veins in it. So, I have decided to write a blog on the same.
To make your paper flowers more realistic and attractive, you need to learn to make paper leaves with veins.
Once you learn this basic tutorial then you can easily transform this practice into most other types of leaves for your flowers.

How to Make Paper Leaves with Veins: Step By Step
I have tried lots of leaves with veins since I started paper flower crafting. And I want to tell you, it’s worth it to learn realistic paper leaves. Because it gives an adorable look to your paper flowers.
Paper Leaves Supply List
To make these paper leaves, you need very limited crafts supplies. Most of the supplies needed are easily available at any nearby craft store.
| Paper:
You can take any shade of green origami paper. If you do not have origami then you can take any green color paper but it should not be very hard. Here I am taking a light green color. You can choose according to your choice of colors. |
| Scale:
A medium sized scale for the measurement of leaves. |
| Scissors:
Take any small sized scissors. |
| Pencil:
A dark pencil for mark and draw basic pattern of leaves. |

7 Easy to Follow Steps to Make Paper Leaves With Veins
So, This blog post will teach you how to make more appealing paper leaves in an easy way. Alright! Let me show you how I am doing this in a step-by-step tutorial.
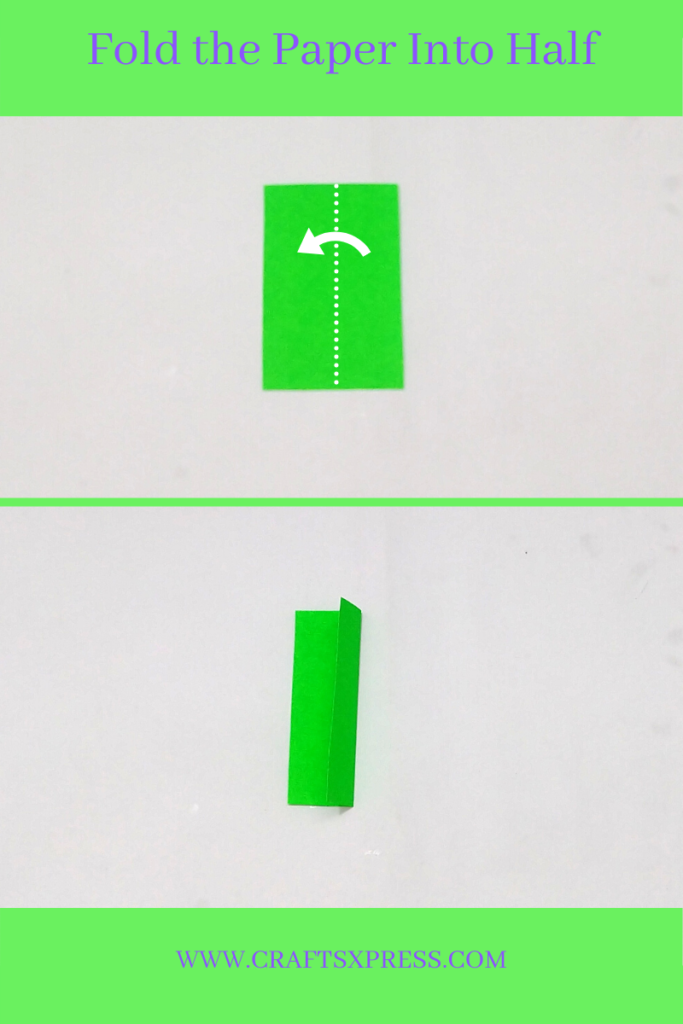
Step 1: Fold The Paper Into Half
Here we are making a medium sized leaf. Firstly, take 4.5 cm * 6 cm paper, and hold it vertically, then make a half fold on it.
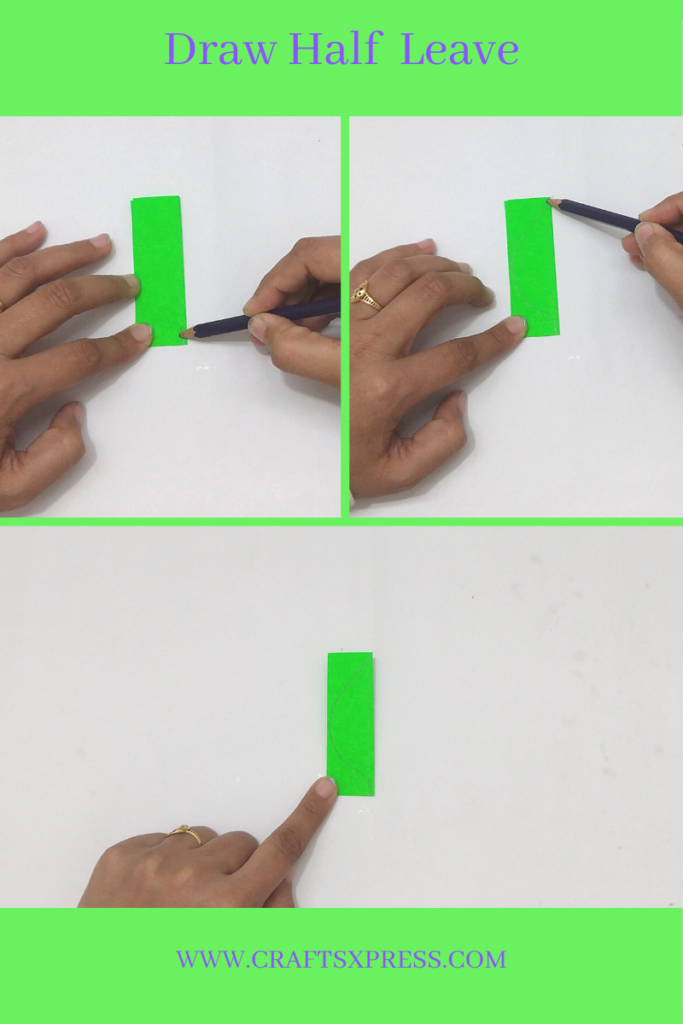
Step 2: Draw Half Leave Pattern On The Folded Paper
After folding the paper into half, draw a half leave pattern on it. Here I’m taking a very basic pattern because we can use this basic type of paper leaves in most of the paper flowers, but you can draw of your choice if you want any different shape for this paper leaf.
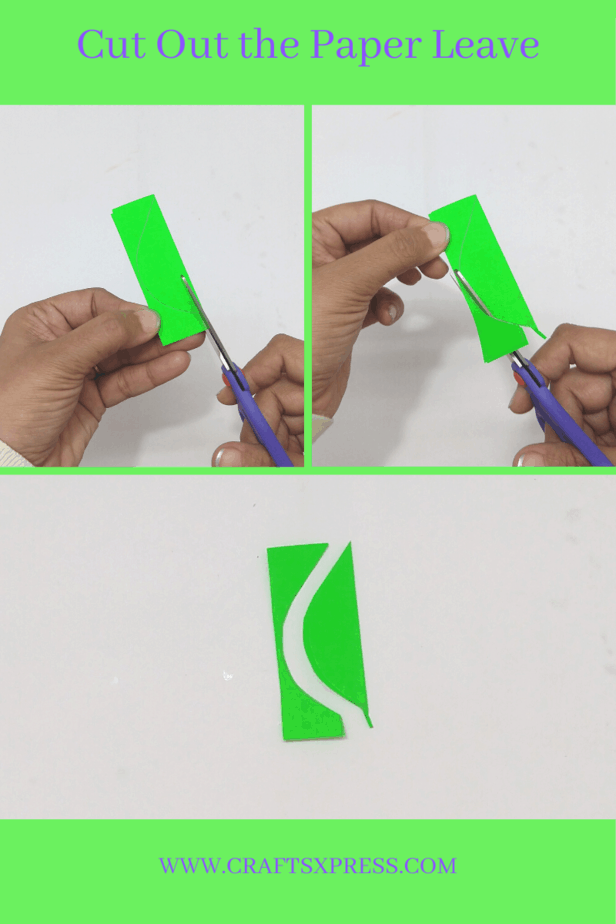
Step 3: Cut Out The Paper Leave
Furthermore, cut through the pattern you drew in the last step. And one more reason for taking this basic leaf pattern is because many of the beginners can easily cut through this pattern. After cutting that pattern you will get a very basic paper leave but without veins. Do not worry, soon you will get the veins too on your leaf.
Step 4: Give Some Detailing To The Leave
And you are ready with your basic leave. Now it’s time to give some details to your leave which make it more realistic. So, what do you have to do now? Take a small scissors and make small cuts to the edges of the leaves, just like the rose leaves.

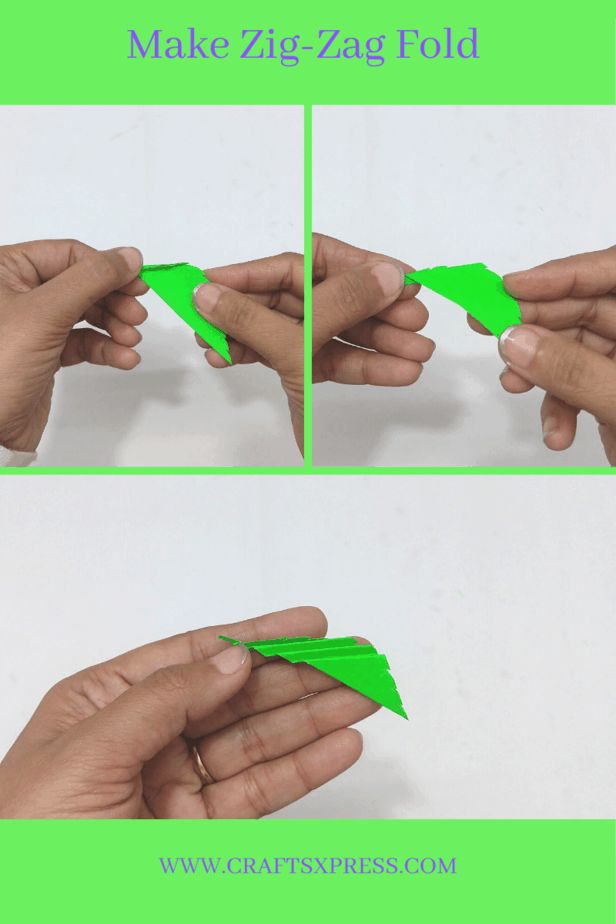
Step 5: Make A Zig-Zag Fold
After giving the detailing, you have to make some zig-zag folds on your leave. Hold your leave half folded, then hold it slightly, slating about 45 degree slant. And start making zig-zag fold on it.
Make sure that you are making folds in a slanting way neither horizontal nor vertical. So repeat the same thing till the tip of the leave. For more appealing paper leaves for roses you need to make narrow and fine folds.
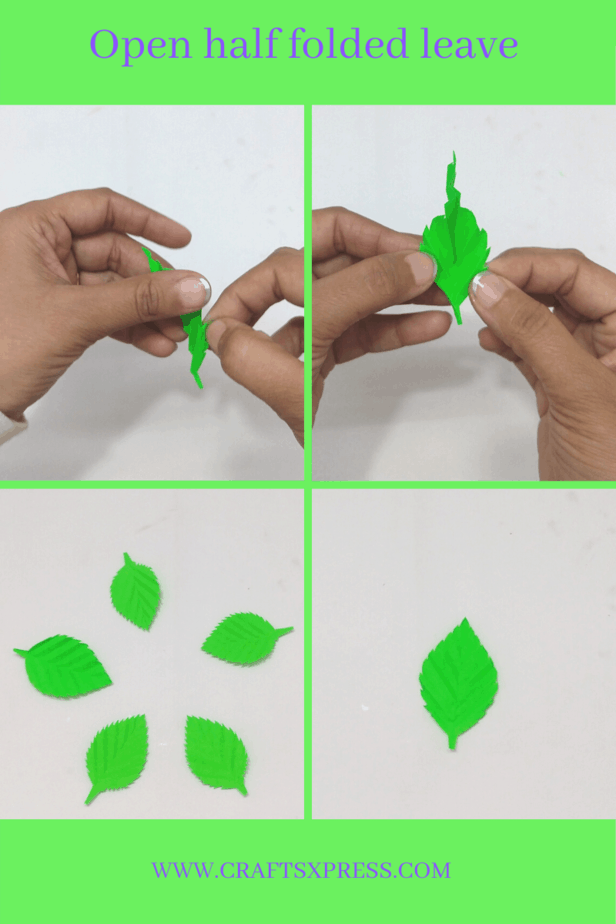
Step 6: Open The Half Folded Leave
Finally you are very close to your final step. Now unfold slightly those zig-zag folds and then open that half fold. Means, you have to completely unfold the leave. And see !! You are ready with your cute and adorable paper leaves. Isn’t it very basic paper leave in terms of learning!!!
Important Points You Should Keep In Your Mind While Making Paper Leaves With Veins
Now I am going to tell you important points you need to keep in your mind while making these super easy paper leaves. What are these? Let’s see.
| First of all, make all the cutouts ready, after that go for zig-zag folding, it will be less time consuming if you follow this. |
| If you need a fine leave then you have to make narrow zig-zag folds on your leave, and if you want to get a rough finish then make wider folds. |
| Do not use so much glue for pasting your paper leaves, because it will take so much time to dry and can spoil your craft. |
| Use small sized scissors, if you are making small size paper leaves otherwise you can use medium sized scissors also. |
8 Amazing Ideas To use Your Paper Leaves In a Unique Way
In case you’re wondering what to do with all of the paper leaves you’ve collected or you are left with after your flower crafts, here is my list of creative ideas. Use them for paper leaves inspired crafts. Let’s go!
1. Animals With Paper Leaves:
Who says a paper leaf has to stay … a paper leaf only? With this imaginative project, your paper leaves can transform into whole new creatures. For example, butterflies, sparrows, tigers and many more.
2. Leave Wall Hanging:
After you’ve created all of your paper leaves, gather some sticks And have some fun helping kids to turn them into a pretty and colorful wall hanging decoration.
3. Paper Leaf Wreath:
One of the things I like to make at this fall time of the year is wreaths. Instead of fall leaves this time you can create your wreath with the paper leaves. They are great fun to make and always look good on your door, window, or you can use them as a centrepiece.
4. Paper Leaves On Tree Branches:
You can reuse your paper leaves in this craft very beautifully. For this you just need a small dry branch of the tree and colorful paper leaves. Furthermore, just paste all these colorful paper leaves randomly on these tiny branches. Your unique decorative piece is ready now.
5. Gift Tags and Toppers With Paper Leaves:
Introduce your baker friends to this simple craft, which requires minimal materials (paper leaves, paint, twigs) to create some show-stopping decorations for your sweets. Use them as a gift tag.
6. Backdrop Decoration With Paper Leaves:
One of the ways to reuse your paper leaves is to use them in backdrop decorations. You can use different types(shapes and colors) of leaves
7. A Crown Of Paper Leaves:
My younger son made a paper crown for me after seeing Miss Universe wearing hers. That was such a loving moment for me. Alright! You can use your colorful leaves to make one for yourself.
8. A Paper Leaf bookmark:
Try different types of bookmarks with these leaves with your kids. Your child can use these bookmarks in books they are reading at home or in the classroom. Also they can give these cute bookmarks to their friends or teachers as a gift.
I hope you enjoy this post about paper leaves with veins along with some fun filled activities. I hope this fall season will be very memorable for you and your family. You can try these activities with fall leaves too. The most interesting thing you have found in this post is- ?. Yes, write this to me. Happy Crafting!